by Team Tradify, February 19, 2025
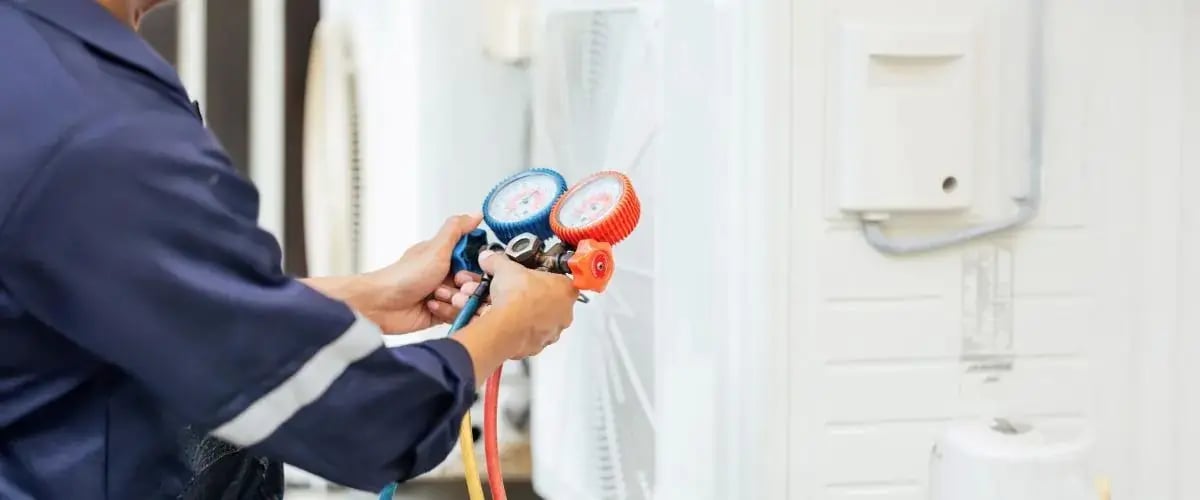
Before adding a refrigerant to an HVAC system, you need to check if there are contaminants, such as air, moisture, and non-condensables. A vacuum gauge works by measuring the vacuum levels inside a HVAC system against atmospheric pressure, using either a mechanical, thermal, or ionisation method. If it reaches 500 microns, your system is good to go — without worrying about long-term damage.
For the best tool for your HVAC business, try Tradify free for 14 days.

- What type of vacuum gauge should you use?
- Selecting the right tools to measure a vacuum
- How to set up a vacuum gauge correctly
- How to read a vacuum gauge
- Final check before charging your system
1. What type of vacuum gauge should you use?
All air, moisture and non-condensable gases have to be removed from an HVAC system, before you can charge it with refrigerant. The process can take a fair while, so it's critical to use the right equipment for each job, to avoid annoying, time-wasting and costly redos. The consequences of a job not done properly can be pretty catastrophic, with contaminants leading to massive system failures, acid formation, or a compressor failure.
Choosing what type of vacuum gauge you should use for any particular job will depend on the price range and how accurate you need the reading to be.
Compound gauges
A compound gauge measures both positive pressure and negative pressure within an HVAC system. Within the dial, a Bourdon tube flexes based on pressure changes. Typically, a compound gauge is used alongside a high-pressure gauge or digital diagnostic tool to completely check the state of the appliance before adding a refrigerant. What's particularly useful about this type of vacuum gauge is that it allows you to monitor the system pressure during both charging and evacuation.
Digital micron gauges
If you need absolutely accurate readings, a digital micron gauge can measure deep vacuum levels by detecting the minute pressure changes in microns (e.g. at levels like 1 micron = 1/1,000,000 of an atmosphere). It uses a thermal conductivity or capacitive sensor to detect molecular density, which provides extremely accurate readings in microns and can be used to confidently verify that moisture and non-condensable gases have been completely removed from a system.
Mechanical gauges
Mechanical gauges measure pressure through physical movement, using a Bourdon tube, diaphragm, or bellows that deform under pressure changes. Its movement is linked to a needle, which moves along a scale to display the pressure reading. Since they're mechanical rather than electronic, they don't need a power source or to be charged. However, they're slightly less accurate than digital alternatives and require you to check the calibration regularly.
Thermal gauges
A thermal gauge typically uses some type of heated sensor to check how gas molecules transfer heat at a rate proportional to the pressure within the system. While they're reliable for mid-range vacuum levels, they can often be contaminated by prior use and will require careful calibration before each new test.
Ionisation gauges
An ionisation gauge measures ultra-low pressures by detecting the number of gas molecules in a chamber. This type of vacuum gauge works by ionising gas molecules using hot filament electrons and measuring the resulting ion current, which is proportional to pressure. However, they do require an initial vacuum, are delicate, and can be affected by contamination.
2. Selecting the right tools to measure a vacuum
Once you've selected the right vacuum gauge for the job, it's crucial to set it up properly. Poor setup can lead to inaccurate readings, unnecessary delays, and even system failures. You'll also need;
- A digital micron gauge – This should provide accurate vacuum readings, down to a micron level, before and after using the vacuum gauge to perform an evacuation.
- Vacuum-rated hoses – Don't bother with a standard charging hose. You'll need a vacuum-rated hose to avoid restriction during the evacuation process.
- A reliable vacuum pump – This must be capable of reaching below 500 microns.
- Core removal tools – Don't forget this step! Removing the valve cores eliminates restrictions at the service ports, making the vacuum work significantly faster and removing any potential blocks.

3. How to set up a vacuum gauge correctly
Once you've collected the right tools, the next step is to set up your vacuum gauge correctly. You'll do this by picking the right position to place the gauge and avoiding any restrictions or errors down the line.
Proper pump placement
What to avoid: Placing the vacuum gauge near the pump. The vacuum pump itself can pull as low as 20 microns, but this night not reflect the actual vacuum level inside the system. It's like checking the temperature of a room by sticking a thermometer by the heat pump. A gauge placed too close to the pump will probably show misleadingly low readings, even though moisture and contaminants may still be present in the system.
Best practice: Position the vacuum gauge at the farthest point in the system, ideally at the evaporator or liquid line. This is the last place to reach the target vacuum, so, when the vacuum gauge at this point reads 500 microns, you can be pretty sure the entire system has been fully evacuated.
Remove valve cores from service ports
Valve cores create extra restrictions within the pump that make it harder to pull down to deep vacuum levels. By using a core removal tool, you can take out the valve cores temporarily during evacuation.
Identify and remove line restrictions
System components such as bends in the line set, filter driers, and small port openings can restrict flow. Check out if anything is blocking or obstructing the line before you start the vacuum process.
Check the seals
Leaky hoses, loose fittings, or worn O-rings can prevent the system from reaching the desired vacuum level. Before starting evacuation, check all connections and seals to ensure there are no leaks that could affect vacuum efficiency.
4. How to read a vacuum gauge
It's tempting to keep a close eye on the vacuum gauge once the vacuum process is underway, in order to check for early signs of a leak. However, fluctuations in readings do not always indicate a leak. So, double check there's not something causing a temporary fluctuation before assuming the worst.
Normal fluctuations
- Ball valve trapped gas – When closing a ball valve during evacuation, a small amount of gas can be trapped inside. This may temporarily spike the vacuum reading. Opening and closing the valve can stabilise the reading.
- Outgassing from hoses and O-rings – Under deep vacuum, hoses and O-rings can release small amounts of trapped gas, leading to a temporary rise in microns. Allow the system time to stabilise before assuming there is a leak.
- Bubbles in the sight glass – If using a manifold with a sight glass, bubbles may appear during evacuation. This does not necessarily indicate a leak; it could be moisture boiling off. If they don't go away on their own, cleaning the manifold block with a flushing agent such as rubbing alcohol or RX11 flush may help resolve the issue.
What to do if the system takes too long to reach 500 Microns
If an evacuation is simply taking forever, it may be an indication that there's excessive moisture or contaminants in the system. If the vacuum level doesn't reach 500 microns, performing a triple evacuation can help.
Triple evacuation method:
- Pull the vacuum down to 1,000 - 2,000 microns.
- Break the vacuum by introducing dry nitrogen at 3-5 PSIG to help absorb and dislodge moisture.
- Repeat the process, pulling the vacuum lower each time, aiming for 300 microns before final isolation.
This process helps remove stubborn moisture and contaminants that a single deep evacuation may not fully eliminate.
5. Final check before charging your system
After reaching 500 microns, isolate the vacuum pump and allow the system to sit for 10–15 minutes. Monitoring the vacuum level during this time helps determine if the system is leak-free and ready for refrigerant.
If the vacuum level rises back to atmospheric pressure within minutes, there's probably a leak in the system that needs to be repaired.
If the vacuum level rises slowly, then stabilises above 1,000 microns, it's likely that moisture is still present in the system. In this case, you'll need to perform a deeper vacuum or a triple evacuation to remove the remaining moisture.
If the vacuum level holds steady at 500 microns or lower, the system is properly evacuated and leak-free and refrigerant can be safely added.
Looking for business software to run your HVAC business? Try Tradify free for 14 days, or pop into one of our free demos.


Quick Quotes Mean More Jobs for Sharp Air Conditioning

How To Set Up a Google Business Profile (for Trade Businesses)

Aussie Electrician Reduces Admin Time by 95%
Give Tradify a go for free!
Save 10+ hours/week on business admin with the highest-rated job management software for tradespeople.
With free one-on-one training and phone support, it's never been easier to get started.
